| Home > My Projects > My Go Kart |
| Home > My Projects > My Go Kart |
Date Of Project: Spring 1999
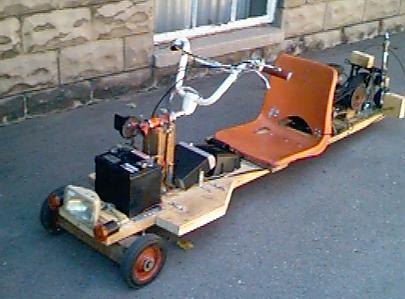
This is actually the third of a series of go karts I built. If you think the engine is the same as used on my scooter, you are right. One of the reasons for the go karts was because I got a little too big for the scooter. As I mentioned, this is number three and is officially referred to as the "SM2K". It is a small acronym for "Sewer Mobile 2000". The name came from the first unit that was built. It was about half the size of the one pictured above and ran on electricity. It was small enough in fact that it fit into the large storm drain outlets in a forest near my house. Hence the name. There were two problems with the first though. It was still too small, and way too powerful. I did not want to spend the money to build or buy a proper motor controller, so it had two speeds; off and fast. When the switch was hit, it would rapidly accelerate until it became too hard to control, at which point I would promptly flip over. And the motor was too powerful and had a tendency to rip itself off it's mountings.
So the electric drive was removed (much too my disappointment) and it was retrofitted with the engine from the scooter. Unfortunately, the small vehicle barely had enough space to hold the larger gas engine. It did work though, and I drove it around for a while. It was almost the rolling death mobile, as it was very unstable and extremely fast. Plus, there were no brakes. I decided that I better just start from scratch and build something much larger, rear wheel drive (the first were front wheel drive) and most importantly, with brakes.
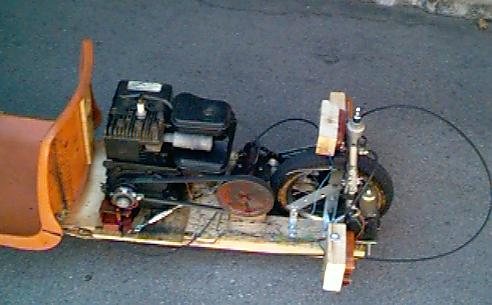
The SM2K actually only took a weekend to build, but about two weeks to debug. I started from the back. The single back wheel was mounted, and then the gear converter was installed. There are two reasons for the gear converter. The shaft on the engine is on the wrong side, and the clutch requires a belt drive. After that the engine was mounted. This actually took some effort, as things had to line up properly and tension had to be put on the belt. I decided to use mounting slots instead of straight bolt holes so that I could adjust things as the belt stretched. It was a matter of using strong rope and a clamp to keeps things tight as I snugged down the four mounting bolts. I would later have to go through this process a few more times after I rebuilt the worn out clutch. The seat is something that anyone who has been in a public school will recognize. In fact, it was, well, liberated from my grade 12 Religion room. It was damaged anyway, and would most likely have been thrown out in a few days. The brake is a standard bike brake, but you can't see it very well in the picture The pads don't last very long and are hot enough to smoke during hard braking.

The front wheels are simple lawnmower wheels from a very old lawnmower. I tried newer plastic wheels, but they just ended up melting. I did, however, have on hand a pair of metal wheels with actual ball bearings. They were installed in place of the plastic ones, and work really well. The front wheels are attached to a 4x4 which pivots on a bolt to facilitate steering. The actual control of the steering mechanism is done by two thin steel cables in standard "soapbox" fashion. The cable is wrapped around the shaft of an old pair of bike handle bars. As the shaft turns the cable is pulled, which in turn turns the front wheels. It is very insensitive steering. The handle bars must be turned a great deal to get a small movement in the front wheels, but this is good as it means that sharp turns are not accidentally made, possibly tipping the thing over. It is a lot more stable than it looks, but not as stable as a wider go kart. The controls on the handle bars as in the form of standard bike brake levers. One controls the throttle, one controls the clutch and the other applies the brake to the back wheel.
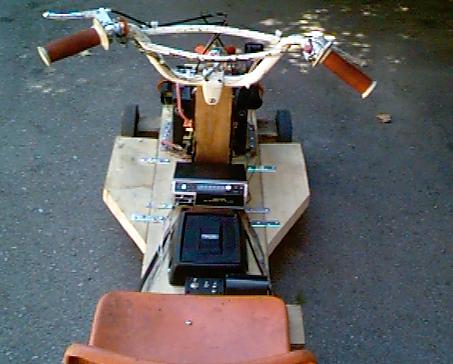
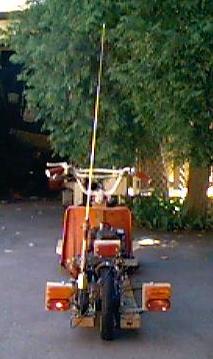
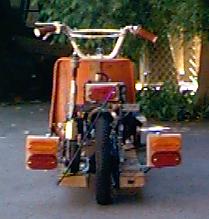
When the basic structure was done it was time for the extras. A AM/FM/Cas stereo was installed, with a single speaker directly in front of the drivers seat. Below the speaker is the small console with the controls. From left to right: Engine kill switch, headlight/running lights, stereo. The one below the stereo switch controls the power antenna. I was tired of stopping to walk behind the engine to pull up an old TV antenna, so I picked up a power antenna out of an old Cadillac at my local scrap yard. Since my radio does not have a controller for a power antenna, it must be raised and lowered manually. But it still more convenient than actually doing it by hand. An the left side of the handle bars there is a small switch to control the turn signals, on the right is a large red button to blow the horn. The small piece of pipe beside the console holds the circuit to flash the turn signals. Power is supplied by a standard 12V car battery, which sits on charge when the SM2K is not in use. There is no alternator.
Want to ride this thing? Well, sorry but I can't have everyone coming to my house to try the go kart. You can however watch a video I made of a short trip around the block. The speeds don't exceed 40KpH (to protect the camera), but it is still quite fun. You can watch the video using the Real Player available from Real Networks as a free download. Choose the version of the video below depending on your connection speed. They are both the same, except one just looks and sounds better than the other. The camera was mounted on the back about a foot from the top of my head.
Low speed version for modem users
High speed for dual ISDN, Cable modems, ect.
Please read the following FAQ before emailing me about this project. It may answer your question. The FAQ is updated based on common questions I receive via email.