| Home > RX-7 > My RX-7 > Project Tina > July 18th, 2007: Finishing The Big Turbo Installation and First Startup |
| Home > RX-7 > My RX-7 > Project Tina > July 18th, 2007: Finishing The Big Turbo Installation and First Startup |
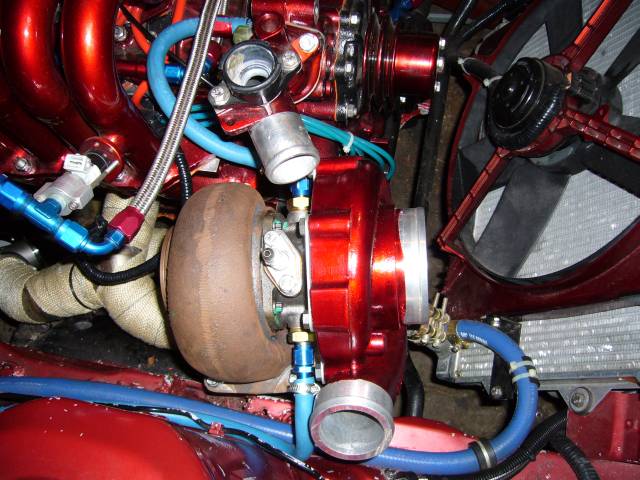
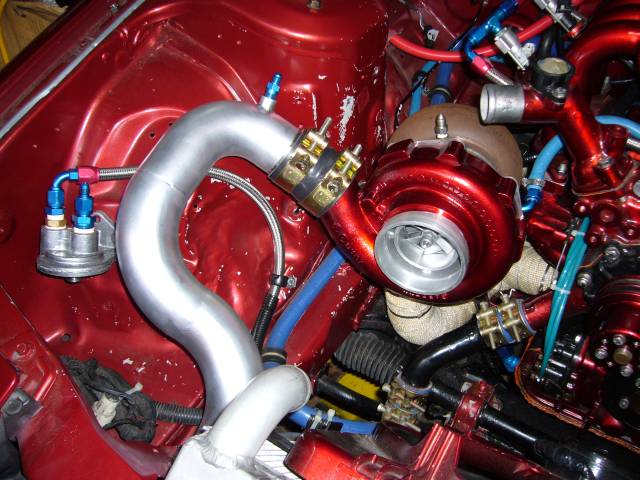
Here's the turbo with the fluid fittings installed. The oil feed is an ATP T4 feed flange. This flange has a 1/8" NPT thread. Screwed into this thread is an oil restrictor (0.40" I think), and from there a 1/8" NPT to -4 AN adapter. The oil restrictor is very important. Without it, the turbo will blow oil. The water feed passages on the GT40R are M18 x 1.5, so a trip to the local hydraulic store scored some adapters to -6 that I sealed with Teflon sealant and copper crush washers. ATP also stocks these, but I forgot to order them when I ordered the other stuff.
Once the heat wrap dried, the manifold was bolted to the engine. I used new stainless nuts as well as some nasty serrated stainless lock washers. I would have used the copper turbo locknuts but there was not enough clearance to use a socket to tighten them. If you attempt to tighten the copper nuts with an open ended wrench, they will easily round off. Of course, anti seize is used on all the fasteners.
Now it was the moment of truth. In order to gain access to the turbo mounting flange with a wrench, I had to pull the compressor housing again. You can see that some creative wrench work was needed to reach the nuts. I was torn between installing studs on the turbo flange or using bolts and nuts. I ended up using M8 stainless nuts and bolts (with lock washers) due to space issues.
.jpg)
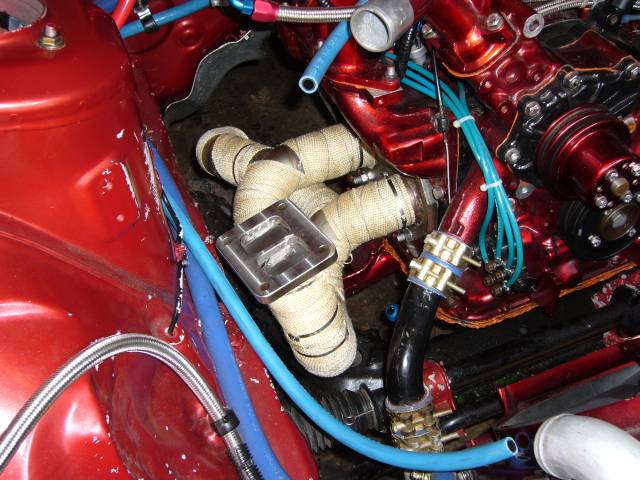
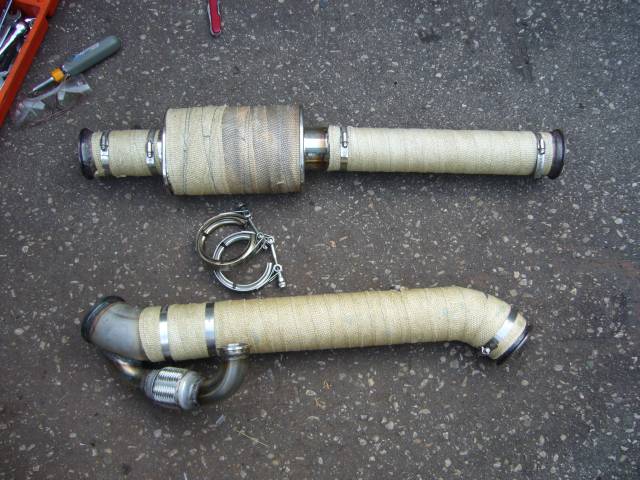
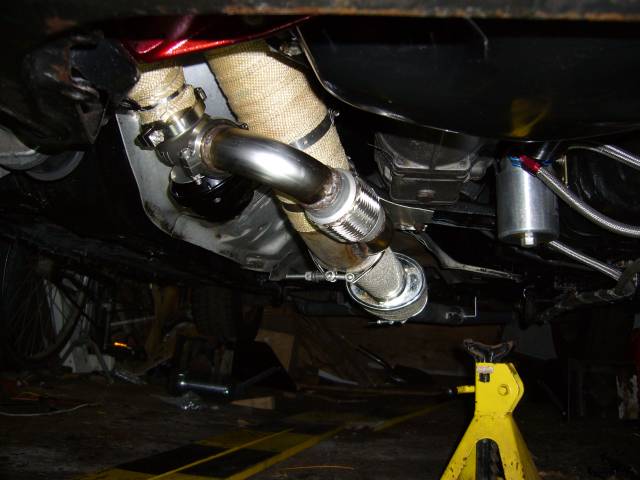
The downpipe and midpipe were heat wrapped along with the manifold. I cheaped out and used hose clamps to secure the wrap instead of the stainless ties. Also the hose clamps are much easier to work with and have less of a chance of cutting you up when you install them (those stainless zip-ties are sharp!).
Before the water and oil lines are installed, the compressor housing had to be remounted. Otherwise there would be no access to the bolts.
Here are the turbo water supply lines. I replaced the previous fuel injection lines with Russel "Twist Lock" hose, but I'm starting to wish that I had not. I didn't use regular braided stainless because the other end of the hose needed to be clamped to the rear iron and water pump nipples. In my experience, braided stainless does not clamp well. The Twist Lock hose was specifically designed for installation over a nipple. However it is a nightmare to work with. The idea is that the hose pushes onto a barbed nipple with a standard AN flare at the other end. In practice, this is nearly impossible to do without possessing superhuman strength. I'm sure on some level this hose works if you use the proper lubricant, spend 6 hours at day at the gym and have a lot of practice, but until then I'll be sticking with my regular braided stainless. I could only manage to get the hose about 3/4 of the way on, so I had to resort to horrible hose clamps. Not even the T-bolt style EFI clamps would do the job as the hose has an odd sized outer diameter. They look like they will hold but this still makes me nervous. Next time I have the upper intake off, I'll tap the block and water pump housing for 1/4" NPT and go with braided stainless.
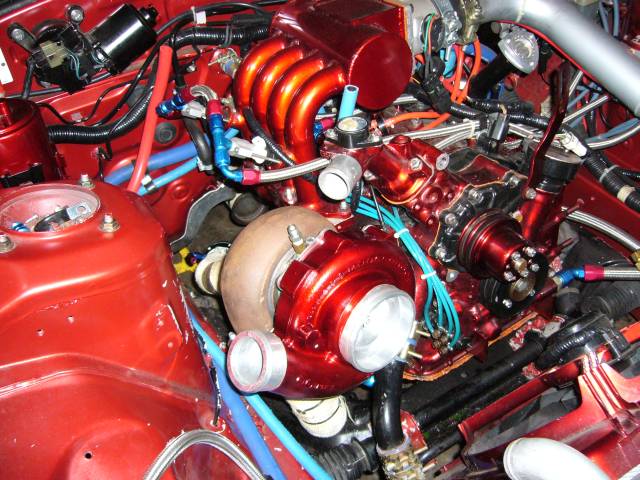
The turbo outlet pipe installed easily with silicone couplers and T-bolt clamps.
Next installed was the turbo oil feed line.

Then the upper coolant pipe. The silicone couplers are made from sections of 1.5" ThermoPol silicone heater hose.

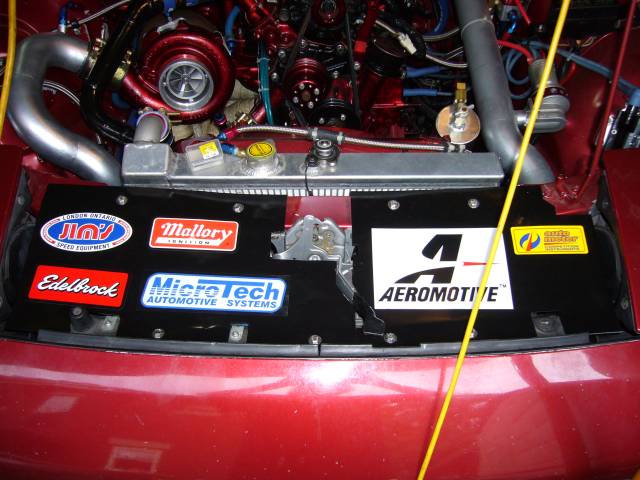
I figured it was time to clean up the front of the car so I installed the rad panels. Afterwards the big black panel looked too barren so I put on a bunch of stickers. Yes, every one of those stickers actually represents a product that's on the car. I wish Tial made smaller stickers because the big Aeromotive decal left no space for Tial.
V-Bands make exhaust work very easy. In a few minutes, the downpipe went into place.
The wastegate and wastegate dump was next. I was very relieved that everything still fit after all the welding and machining. The flex pipe actually took very little flexing to get into position.
When everything has V-bands, the strategy is to leave them all a little loose until they are all installed, then tighten in stages. If you just crank down on them one at a time you'll never get things lined up.
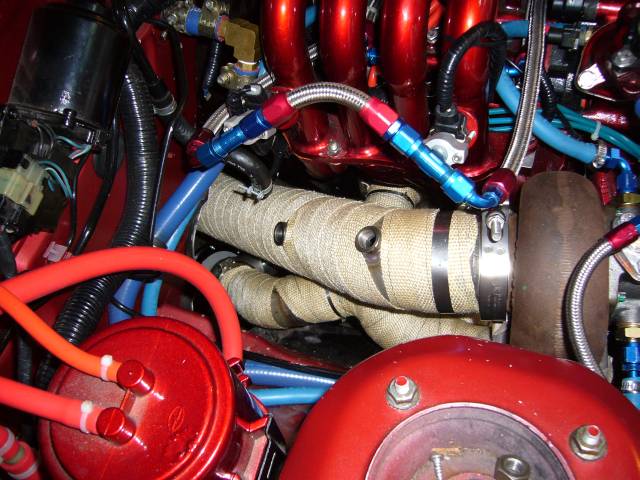
To keep the turbine housing from baking everything around it, I installed a DEI turbo blanket. It cost under $90 and came with a long section of 6" wide exhaust wrap (to wrap the turbine housing), the outer aluminized insulating blanket, two 20" ties, two 10" ties and a good amount of 2" wrap to cover the downpipe. All in all, a very good deal. The instructions sucked and worried me a little in the sense that it looked like a real bitch to install the thing, but I was surprised at how easily it went on and how well it fit. Certainly money well spent. Looks pretty damn bitchin' as well.
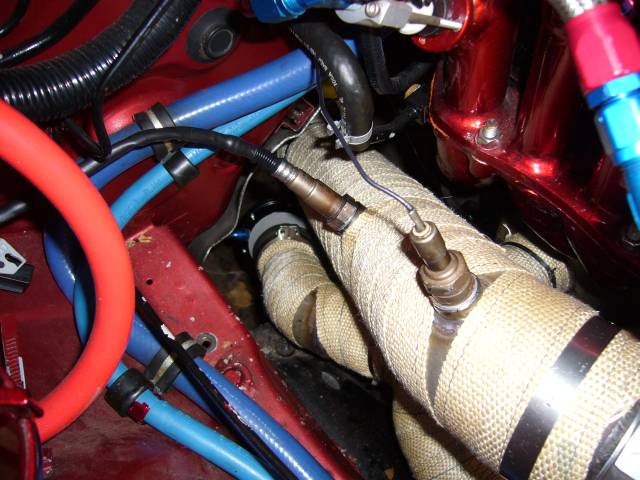
The Microtech uses a narrow band O2 sensor (top), while the Nexus Wideband gauge uses a (duh) wideband sensor. A little anti-seize on the threads keeps them from getting stuck.
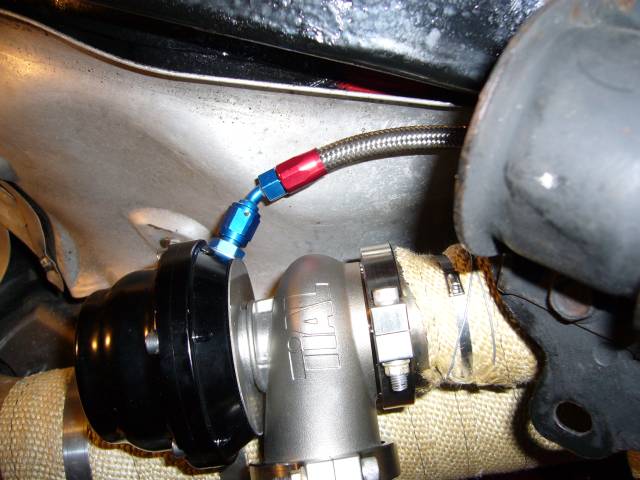
A few years ago when tuning a car, I nearly blew up someone else's engine because their silicone wastegate line popped off. That problem should not exist on this car due to the use of -4 braided stainless line and AN fittings. When I install a boost controller, it should be no trouble adapting the hose by changing ends. For now, the wastegate is just running naturally on the 0.9 bar spring.
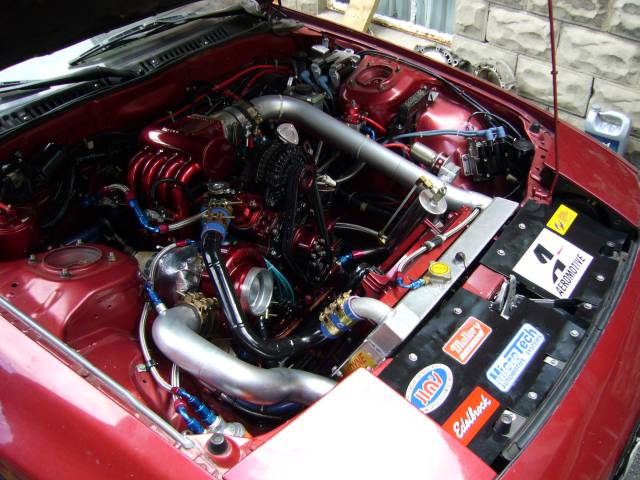
That was the last hose to be installed! With that, the engine bay was complete. Now I was still waiting for an air filter when I took this picture, but since then a smaller K&N "muffin" unit has been installed. It's been a hell of a lot of work getting the engine bay to this point, but for the most part it's now complete.
Really, I don't think many people appreciate how much work is involved in a custom big-turbo setup. Things are easy when you buy off the shelf. There's about 2 months of fab work in that engine bay just for the turbo manifold, downpipe, midpipe and intercooler piping, working 8 hours a day on weekends and several hours a night on weeknights.
So now you're probably wondering "Where's the video?". Well, there isn't one. To make a long story short I just finished up around 5PM on Sunday. After setting up the camera and making my introductions, I tried to start the car and....nothin'. It started, then stalled. Then started, then stalled. Connected up the laptop to tweak the fuel maps and could not manage to communicate with the Microtech. After an hour of troubleshooting I was frustrated enough that I just put the car back in the garage and made dinner. Turns out that I'm a complete assclown and forgot to use the laptop adapter necessary to connect to the Microtech! Well damn.
Monday night I installed the air filter, put the insurance info in the glovebox and with my laptop adapter in hand, we started the car. Fired first try and settled down to it's typical idle after some warming up. A/F ratios according to the wideband were actually very good, considering I did all my tuning last fall with the narrowband. Idle was right around 13.5:1, and light throttle was a littler rich at 12:1.
After checking for leaks, we set about driving the car for some basic tuning. An hour or so was spent cleaning up the light load section of the map now that there was A/F ratio feedback available with the wideband and the car now drives brilliantly. Easily cruises along at 2,000 RPM in 5th gear with no drama and A/F ratios in the high 13s. Still a bit rich for my tastes so some more time will be spent to clean things up.
What stuck me most was how easily the turbo responds. We only tuned up to a few PSI, but even then it was obvious that the turbo has a lot in it. Boost response is very good and spool at even light throttles is very impressive for such a large unit. Overall I'd say it responds approximately equal to a HT-18 on a stock port car. But the sound! Oh, so sexy! Even at just above atmospheric pressure the turbo howls in such a satisfying way. I can't wait until I have some time to really tune the car so it can see some real boost. At less then 10 PSI, the GT40R is still practically asleep. Actual tuning is expected to take place within a week or so, mainly on the (deserted) street. Then it's time to hit the dyno.
I promise to have a few videos available soon. I'll put up my botched startup attempt and edit it together with a good startup. Also I may mount a camera in the engine bay and go for a drive so people can see and hear the turbo.
What's next? Well, the car still needs an interior and suspension, but for now I'm just going to enjoy it as it is and then deal with those details over the winter.
![]()