| Home > RX-7 > My RX-7 > Project Tina > Project Tina, June 2nd, 2010: Rear Suspension Reassembly, Another Resonator, Front End Rebuild |
| Home > RX-7 > My RX-7 > Project Tina > Project Tina, June 2nd, 2010: Rear Suspension Reassembly, Another Resonator, Front End Rebuild |
It has been a busy April and May for me. With the good weather coming early, I was kind of caught with my car sitting in my shop. And there was a local meet at the end of May that has become somewhat of a tradition, so I needed to work my butt off to get the car back on the road. The last update, posted at the end of April, was already out of date as much of the work presented in this update was well on the way to being completed. So here is that work, and probably the last update on this project in a long time save for some dyno graphs. For you see, aside from a few minor issues, I can stick a fork in it because it's done. Well, as done as something like this can ever be. I'm contemplating some body mods but that won't be for a while (I have a '76 Cosmo to restore).
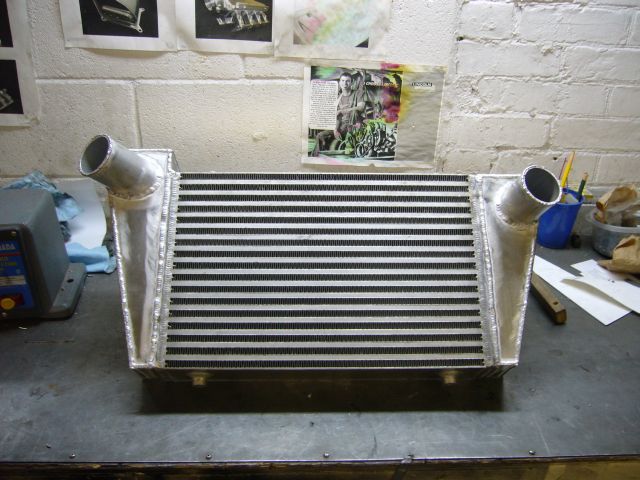
Without further rambling, let's get to it. We finished off the last update with new end tanks fabricated for the intercooler. The old tank modifications I performed years ago were just nasty, so I cut them off and made new tanks from scratch. My butt dyno might just be due for calibration, but it sure feels like the car has picked up some power on the new tanks.
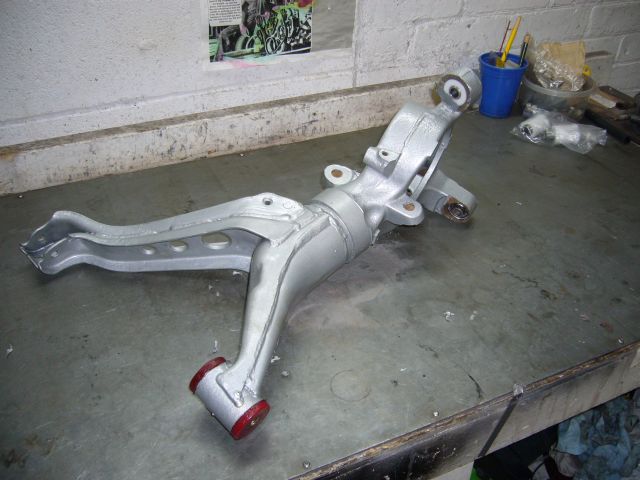
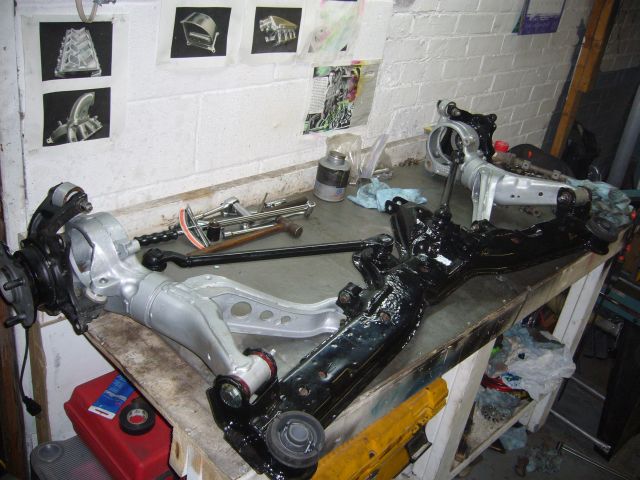
In the last thread, I had painted the rear suspension stuff in POR-15 after it was all sand blasted. Here is the drivers swing arm all painted up with the poly pivot bushing and Delrin upper hub bushings installed. The stock lower pillow ball was pressed back into place. Note that for anyone replacing the rear trailing arm bushings, there is one minor trick. The stock rubber bushing has an outer metal sleeve, and this sleeve can become one with the trailing arm after many years. If your trailing arm bushing bore still has flared ends after removing the bushings, the sleeves are still in place! Cut/press them out and the new bushing will fall into place. I did not notice these sleeves were from the old bushing, which caused me two days frustration in trying to install the new bushings...
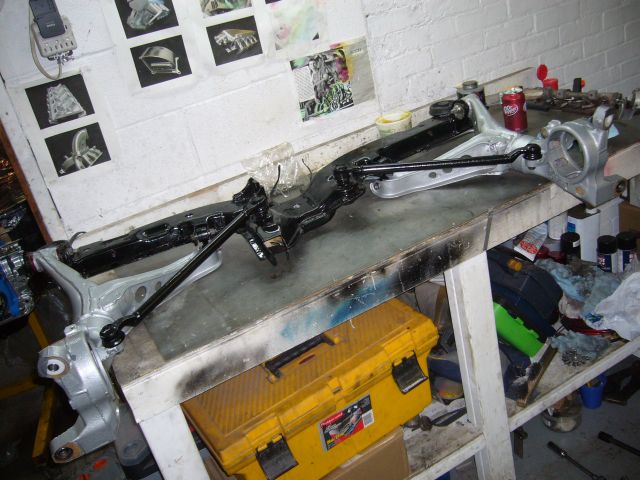
It was then time to reassemble the rear suspension. I purchased new dog bone links from Mazda, as well as new trailing arm cam bolts and plates. Really, much of the hardware is brand new save for a few washers and bolts that were in fine shape. The link arms seemed fine when removed from the car, so I just painted them and reinstalled.
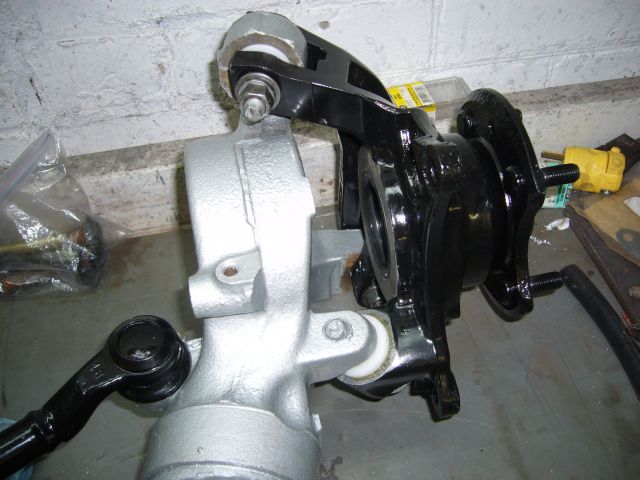
The hubs went on easily. All the hardware was near perfect (looks like it is Dacral coated) with the exception of the toe bushing bolts, but they were just cleaned up on the wire wheel. Actually, one of these bolts was stuck inside the original DTSS bushing sleeve. The sleeve tore from the bushing as I removed the bolt. I needed to cut the sleeve in half with a Dremel and then pry it off the bolt. The subframe bushings are also new.
Here's a closeup showing the Delrin bushings. The lower bushing is the toe steer eliminator. Kind of wish I had painted the bushing flanges, now that I see how the hub fits. Meh, live and learn I guess. The hubs went out to the machine shop where new bearings were installed and then I just shot them with black paint.
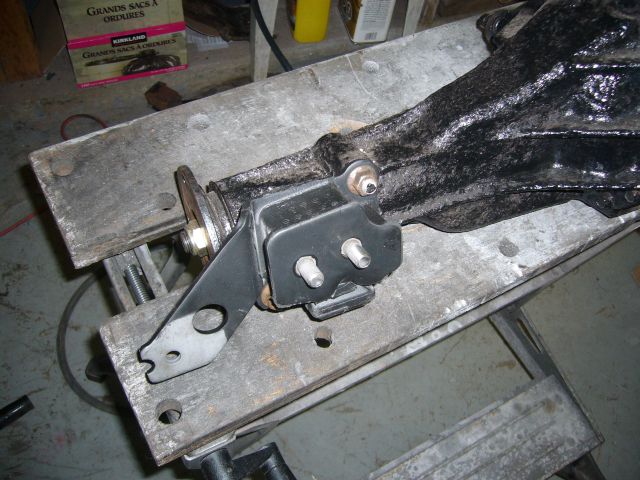
The new Mazda Comp diff mount was installed before the differential was bolted to the subframe. This is a GXL LSD (remember, my drivetrain is NA save for the transmission) that was fully rebuilt by a local shop. I wish I had sent the snout out for sand blasting and then POR-15'd it, because I think the black rocker-guard paint won't last very long. If it was not such a pain in the ass to remove the diff I would blast it myself (I recently purchased a sand blasting pot after adding up all the money I have spent on blasting lately).
The diff was then bolted to the subframe. The rear diff mounts are also Mazda Comp. This rear end assembly, that started as light individual components, is now pretty heavy.
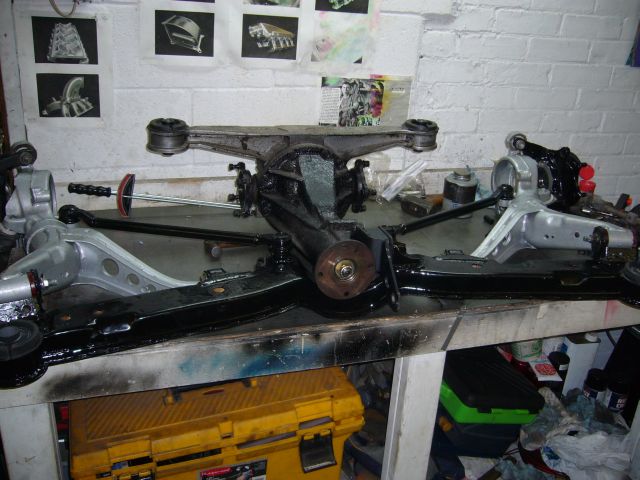
Don't let dropping the subframe and diff intimidate you, it is actually pretty easy. Just make sure to keep all hardware soaked in PB Blaster for a few days prior and clean up all the threads before you try to remove bolts. Getting it back into place is equally as easy if you have three jacks and a helper. It probably took all of 10 minutes to raise the rear subframe assembly back into place and bolt it down (bolt it up?). After that I set about reconnecting the struts and then reinstalling the stabilizer bar. The stabilizer bar got poly bushings as well, from the Energy Suspension set.
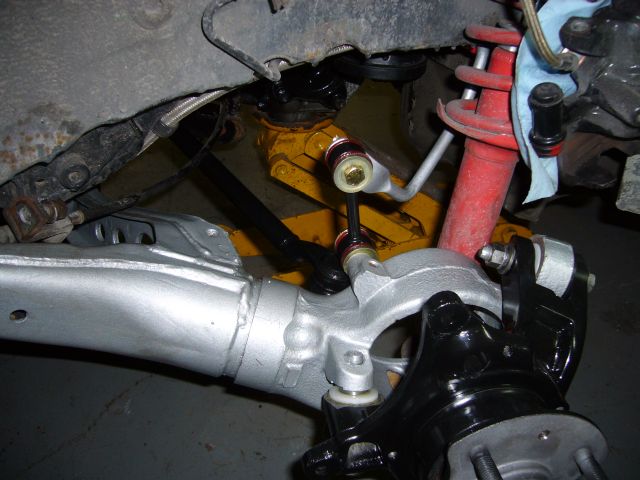
With my snout fully lubricated, I eased the driveshaft into the tail end of the transmission, then joined the rear of the shaft to the mating surface on the differential. Note the grease fittings on the shaft assures it will be well lubed into the future no matter how much of a pounding it takes.
![]()
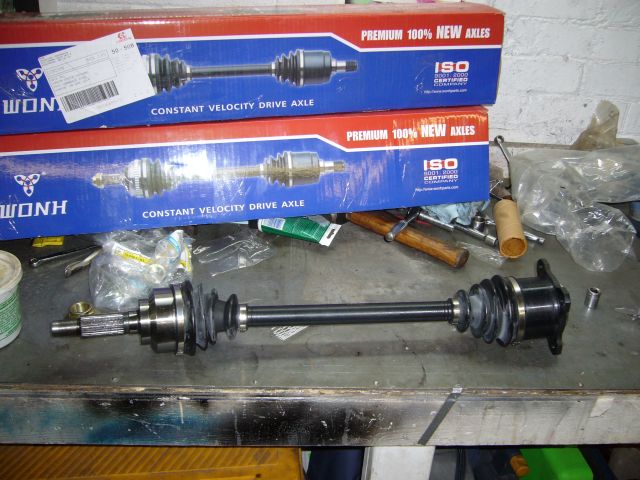
From the local driveline shop, I picked up some brand new CV axles. Not bad for $85 each. The only thing that annoyed me is that the hub-side nut was different on the new part. Coarser threads and no crimp area. I used plenty of red Loctite in the absence of a punch.
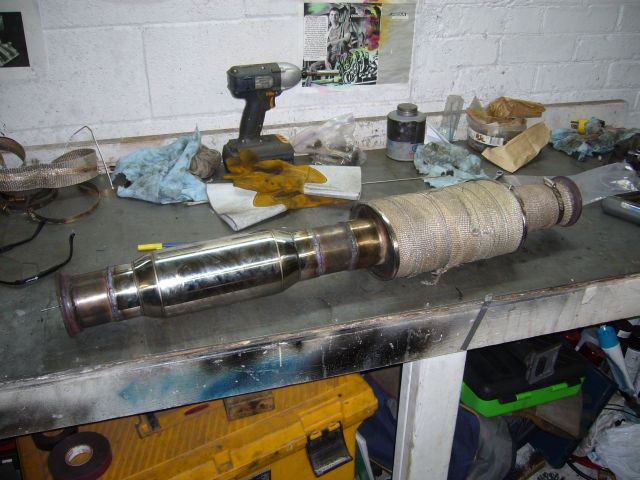
Everyone who knows me, also knows that I have literally spent 10 years trying to get the perfect rotary exhaust note. I was so close with the latest setup on my car, but there was a "concussion" at idle and a resonance (felt as a pressure in the cabin) at certain engine speeds. The 3" Vibrant Ultra-Quiet resonator I originally installed was doing a great job but I wanted to shift the frequency a little to fix these issues. There was space in my midpipe for another resonator so I picked up a Vibrant 3" x 12" bottle style resonator.
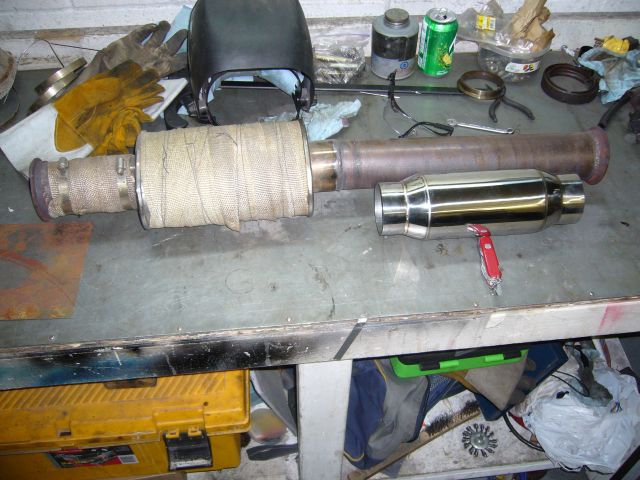
Measured, cut, welded and done. I then heat wrapped it. At the same time I also double heat-wrapped my downpipe.
This resonator has made a huge difference. The car is nice and loud when I'm on the throttle above 3500 RPM, but below that around town it is nice and quiet. Not stock quiet, of course, more like RB Rev II quiet. The idle still has the bridgeport pulsing but the concussion of it is gone. And no more resonance on the highway.