| Home > RX-7 > Tech/Mods > Modifications > How To Install 4 Piston Brakes On A 4 Lug FC RX-7 |
| Home > RX-7 > Tech/Mods > Modifications > How To Install 4 Piston Brakes On A 4 Lug FC RX-7 |
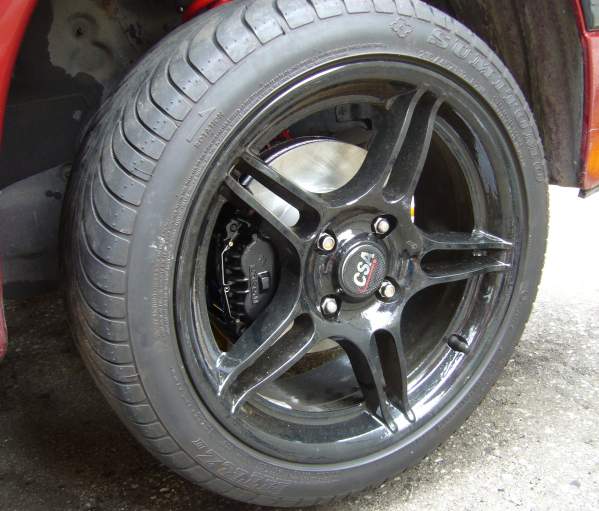
While the single piston front brakes found on base model RX-7s are excellent, they do have their limitations. High horsepower or track driven cars will quickly exhaust the heat capacity of the smaller rotors. The single piston sliding caliper does not have the precise feel of the fixed 4 piston unit, and the smaller rotor provides far less of a lever on which the caliper can clamp. As the more up market 2nd gen RX-7s (TII, GXL, GTUs, etc.) came with the 4 piston setup it is a common modification to swap the hub and brake setup onto the single piston cars. However, there can be one major disadvantage to this swap; it converts the car from 4 lug wheels to 5 lug wheels. If you are looking to ditch a set of factory 4 lug wheels this may be a bonus for you as it opens up a much wider selection of wheel choices. But what if you found a nice set of 4 lug wheels already and intend to be happy with them for years to come?
In that case, you have probably thought that you are stuck with the smaller single piston brakes. In fact, this is not so. With only a little bit of simple fabrication, the factory 4 piston parts can be made to bolt onto a 4 lug car. The resulting hybrid setup uses factory 5 lug rotors, 4 piston calipers, single piston flex line and of course, the original 4 lug hubs.
You can make these spacers yourself, but I highly recommend having them cut at the local machine shop. It is important to keep the hub assembly balanced which may not be possible if using hand tools. A machine shop can inexpensively mill out a set, or if they are so equipped, cut them out on a water jet or laser cutter.
A template is available below as both a JPEG image and a standard DXF file which you should be able to open in any CAD program.

Download Spacer In DXF Format (Zipped, 1K)
The spacer needs to be cut out of 4MM steel. If you need to substitute a size, use the next size smaller.
With the bare hub now exposed, thoroughly clean the surface with a wire brush. A small wire wheel mounted onto a drill works very well. Clean around the wheel studs, around the circumference of the hub and the area where the tapered section (to which the dust cap snaps) meets the rest of the hub. It's important that all junk and corrosion be removed so the new rotor will sit flush.
Place the 4 lug rotor on top of the 4 piston rotor and carefully line them up using the center hub hole. It does not have to be perfect but it should be as close as you can humanly get it. If you have some kind of centering jig available, by all means use it but you can get it very close by simply running your thumb around the inside of the circle, pushing slightly until you no longer feel a ridge where the rotors stack. You're going to want to position the 4 lug rotor so that one of the holes lines up to a corresponding hole on the 4 piston rotor. Set it up so that you end up with the most amount of metal between the factory holes and location of your new hole. It may take a few rotations of the new rotor before you get it right.
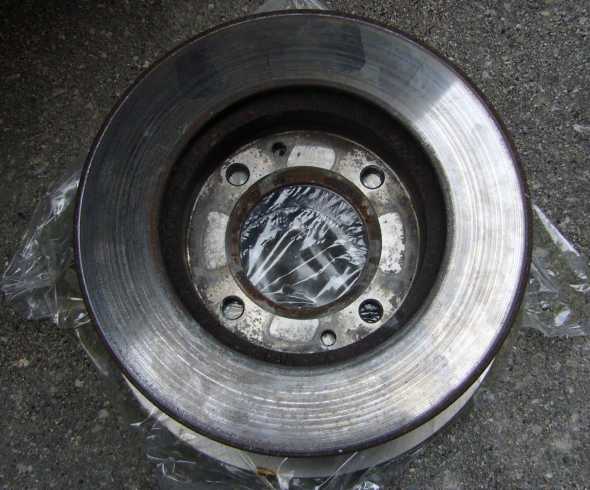
Now without disturbing the position of the rotors, center punch the location of the holes on the 4 piston rotor. Just punch the wheel stud holes, don't bother with the small screw holes as they will be of no use.
Now remove the 4 lug rotor. If you are using a hand drill, securely clamp the 4 piston rotor to a work bench and drill out the holes. Use a lot of cutting oil and drill them out in several steps. Start with a 1/8" bit, then go to 1/4", then 3/8" (or 7/16", or whatever size is convenient and close enough). Finally drill out to the finishing size which will be 9/16" (14.2MM). You will need a powerful drill and a good set of bits to do this. Don't bother trying to use that 9.6V cordless drill, you need an 18V beast or something with a cord. Keep the speed slow and lubricate well with cutting oil. If you have a drill press, you can probably drill out 1/4" and go right to 9/16" without taking all the intermediate steps. Deburr the new holes both front and back.
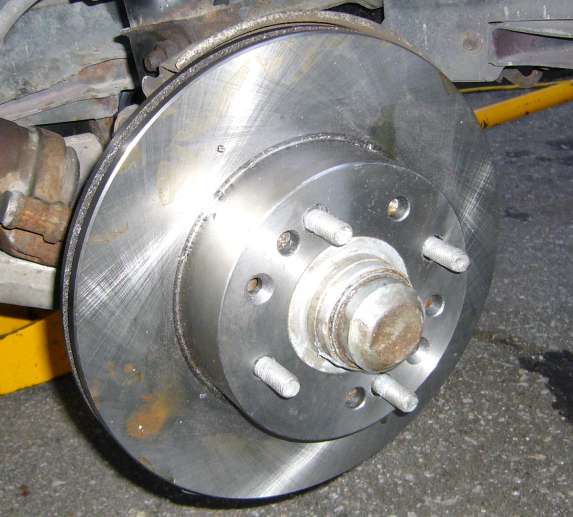
The rotor should now fit over the 4 lug hub and remain centered due to the hub centric center hole. While test fitting you will find that the rotor scrapes the dust shield. Don't worry about this for now.
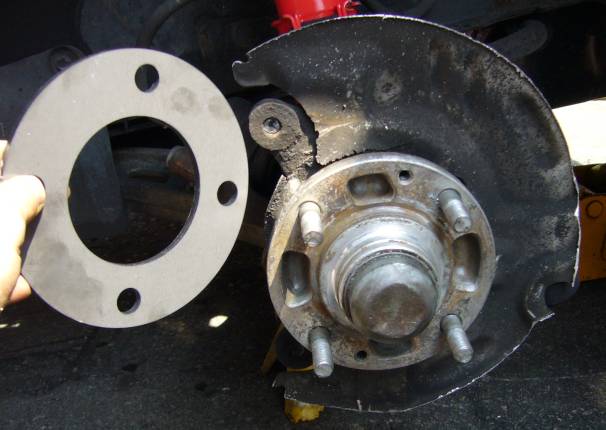
The second approach, and perhaps the more elegant one, is to swap on the 4 piston dust shield. They are available at the dealer as parts FB05-33-260B (right) and FB05-33-270B (left). However removal and replacement of the shield involves removing the hub, and thus needing to service the bearing at the same time. If you bearings and bad then you might as well replace the dust shield as you will be removing the hub anyway.
The choice is up to you. However it is worth mentioning that most track cars don't use the dust shield in favor of more airflow and thus better brake cooling.
When the spacer is ground enough to fit flush against the hub, coat the hub side with a generous helping of anti-seize and then place it over the wheel studs onto the hub. Repeat for the other side.

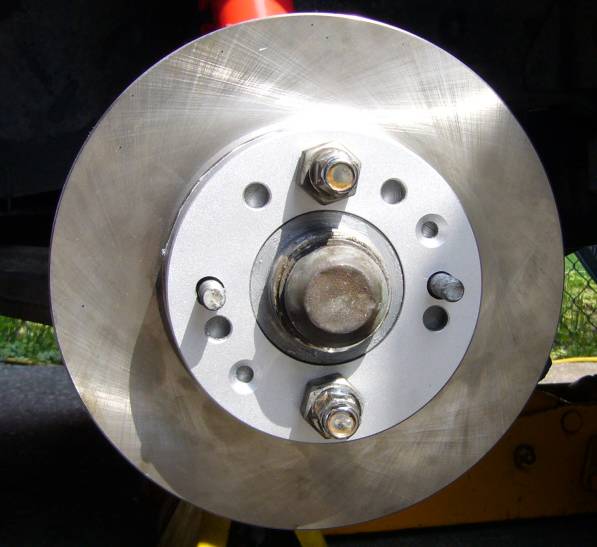
It's a good idea to use a bit of caliper paint on the exposed areas of the rotor hat so they don't rust up the first time it rains. Nothing is more ugly then an exposed set of rusty rotors under a great set of wheels.
Clean all the gunk that may have accumulated on the brake flex line fitting with a rag and some brake cleaner. Put a small dab of anti-seize on the threads of the fitting, making sure not to get any onto the flared sealing surface (you don't want it to end up in the caliper). Holding the flex line stationary, spin the caliper onto the line until snug. Now tighten it up with a flare nut wrench (10MM). If you find that you must twist this line to install the caliper, you're going to have to remove the line from the car and let it hang free during caliper installation. Then reconnect it to the car once the caliper is in its final orientation.
With the line attached, place the caliper onto the hub with the brake bleeder at the top and line up the bolt holes. Those who have done a brake job on a factory 4 piston car are probably wondering where the caliper shim is. It's not used in this setup. With anti-seize on the threads, install and snug up the caliper bolts. Once both bolts are installed and the caliper is held in place, torque to 58-72 Ft-LBs. The rotor will sit a bit closer to the outside of the caliper then the inside. This is normal due to the width of the spacer (and why I say to go thinner on the spacer rather then thicker if you can't find 4MM stock) and will not effect operation of the brakes or pad wear.
Now insert the pads. Put anti-squeal goo on the backside of the pads and both sides of the shims, then insert into the caliper. Coat the guide pins in brake lube and push them through the caliper and pads so that the end with the hole faces the back of the caliper (note the picture is taken with the pins installed backwards so you may see how they are installed). Install the bare metal pin retaining spring through the holes in the back of the pins. Finally, install the blue pad spring as shown. It hooks around the bottom most pin and into the caliper.
Repeat for the other wheel.
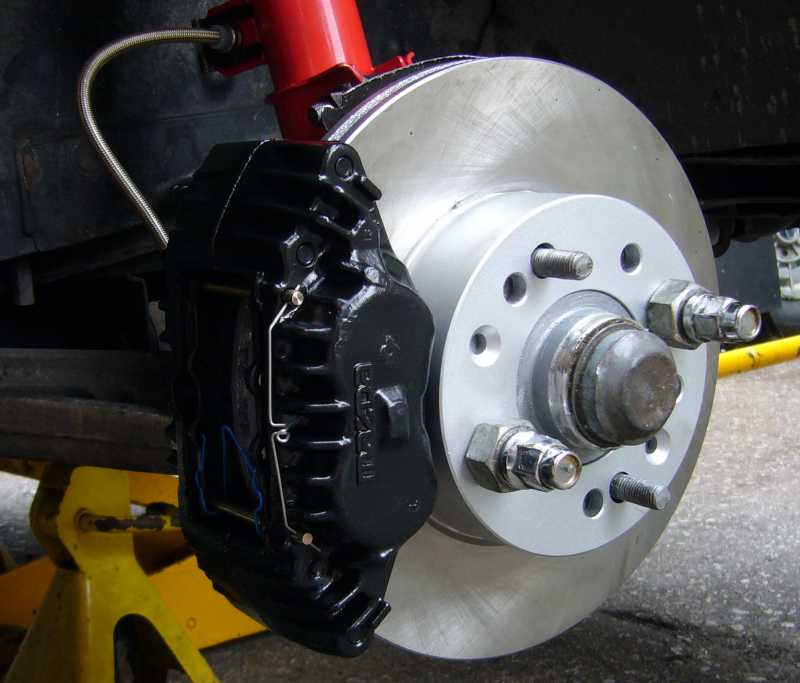
Painting the caliper really improves its appearance. Caliper enamel is available at most auto parts stores and is formulated to resist heat and brake fluid. I prefer to use VHT brand. When you paint, make absolutely sure that the caliper is perfectly clean first and make sure to cover the fluid connection.
Back To Mods Page | Mail Me | Search | ![]()